Base Mission
7 points Live judgedCreate one stack consisting of a Green Cube a Yellow Cube, or a Yellow Cube a Green Cube.
Unit 3 · Big Idea 5 · Capstone
Student Lab · Mission 3 — Stack Both Cubes
Student PIN:
This is it — the moment everything comes together. Over this unit you built a whole toolbox: driving a measured distance, turning a reliable 90°, and lifting with a safe, smooth arm and claw. Today you’ll compose those tools into a complete mission. Your robot will drive to a cube, pick it up, stack it on a cube of the opposite color — then reposition itself and do it a second time for the bonus. No new commands today. The challenge is planning: putting your tested tools in exactly the right order.
Core Insight
A complex mission isn’t built from new code — it’s built by sequencing reliable tools you already trust. The hard part is the plan, not the parts.
Your toolbox (all from your library)
Tick_Drive(ticks) · Back_Drive(ticks) · turn_right() · turn_left() · move_arm(position) · move_claw(position) — plus your tuned values ARM_MIN, ARM_MAX, CLAW_OPEN, CLAW_SHUT. You’ll build Back_Drive in Phase 2.
Today's goal
Complete the bonus by building two stacks.
The two stacks are in different spots, so after finishing the first, your robot has to move over and line up with the second. That repositioning is the new challenge.
Mission 3
Create one stack consisting of a Green Cube a Yellow Cube, or a Yellow Cube a Green Cube.
Create a second stack consisting of a Green Cube and a Yellow Cube.
Create two stacks such that one contains a Green Cube a Yellow Cube, and one contains a Yellow Cube a Green Cube (opposite color arrangements).
Say the mission back in your own words. What makes the second stack harder than the first?
Your library can drive forward a measured distance with Tick_Drive — but a real stack needs the robot to back away after placing a cube, so it doesn’t knock the stack over. You don’t have a backward version yet. Let’s build one, and the trick is in the math.
When the robot drives forward, the encoder counts up: 0, 1, 2, 3… So Tick_Drive waits with while (gmpc(0) < ticks) — keep going until the count climbs to the target.
When the robot drives backward, the wheel turns the other way, so the encoder counts down into negatives:
forward:    0  ->  1  ->  2  ->  3  ... up to +1000
backward:   0  -> -1  -> -2  -> -3  ... down to -1000
So to back up the same distance as Tick_Drive(1000), you wait until the count reaches −1000. The question is how to write that comparison.
Picture the number line. You start at 0 and slide left toward −1000. The whole time, your count is greater than −1000 — until you arrive. So the loop runs while gmpc(0) > -ticks:
void Back_Drive(int ticks)
{
	cmpc(0);                         // clear the counter to 0
	while (gmpc(0) > -ticks)         // count DOWN until we reach -ticks
	{
		motor(0, -50);             // both wheels backward
		motor(3, -50);
        msleep(10);
	}
	motor(0, 0); motor(3, 0); msleep(50);   // brake
}
You still pass in a positive number — Back_Drive(1000) — and the function flips the sign for you. The -ticks turns your 1000 into the −1000 target.
Explain in your own words why the loop uses > -ticks instead of < ticks. What is the encoder count doing as the robot backs up?
Test it: call Back_Drive(1000) right after a Tick_Drive(1000). Did the robot return to about where it started? Add Back_Drive to your library when it works.
Mission 3
Create one stack consisting of a Green Cube a Yellow Cube, or a Yellow Cube a Green Cube.
Create a second stack consisting of a Green Cube and a Yellow Cube.
Create two stacks such that one contains a Green Cube a Yellow Cube, and one contains a Yellow Cube a Green Cube (opposite color arrangements).
Before a single line of code, draw your plan. Mark your starting box (drawn for you), both cube pairs (the cube to lift and the cube to stack on), and the path your robot will travel. This map is what your whole program will be built from.
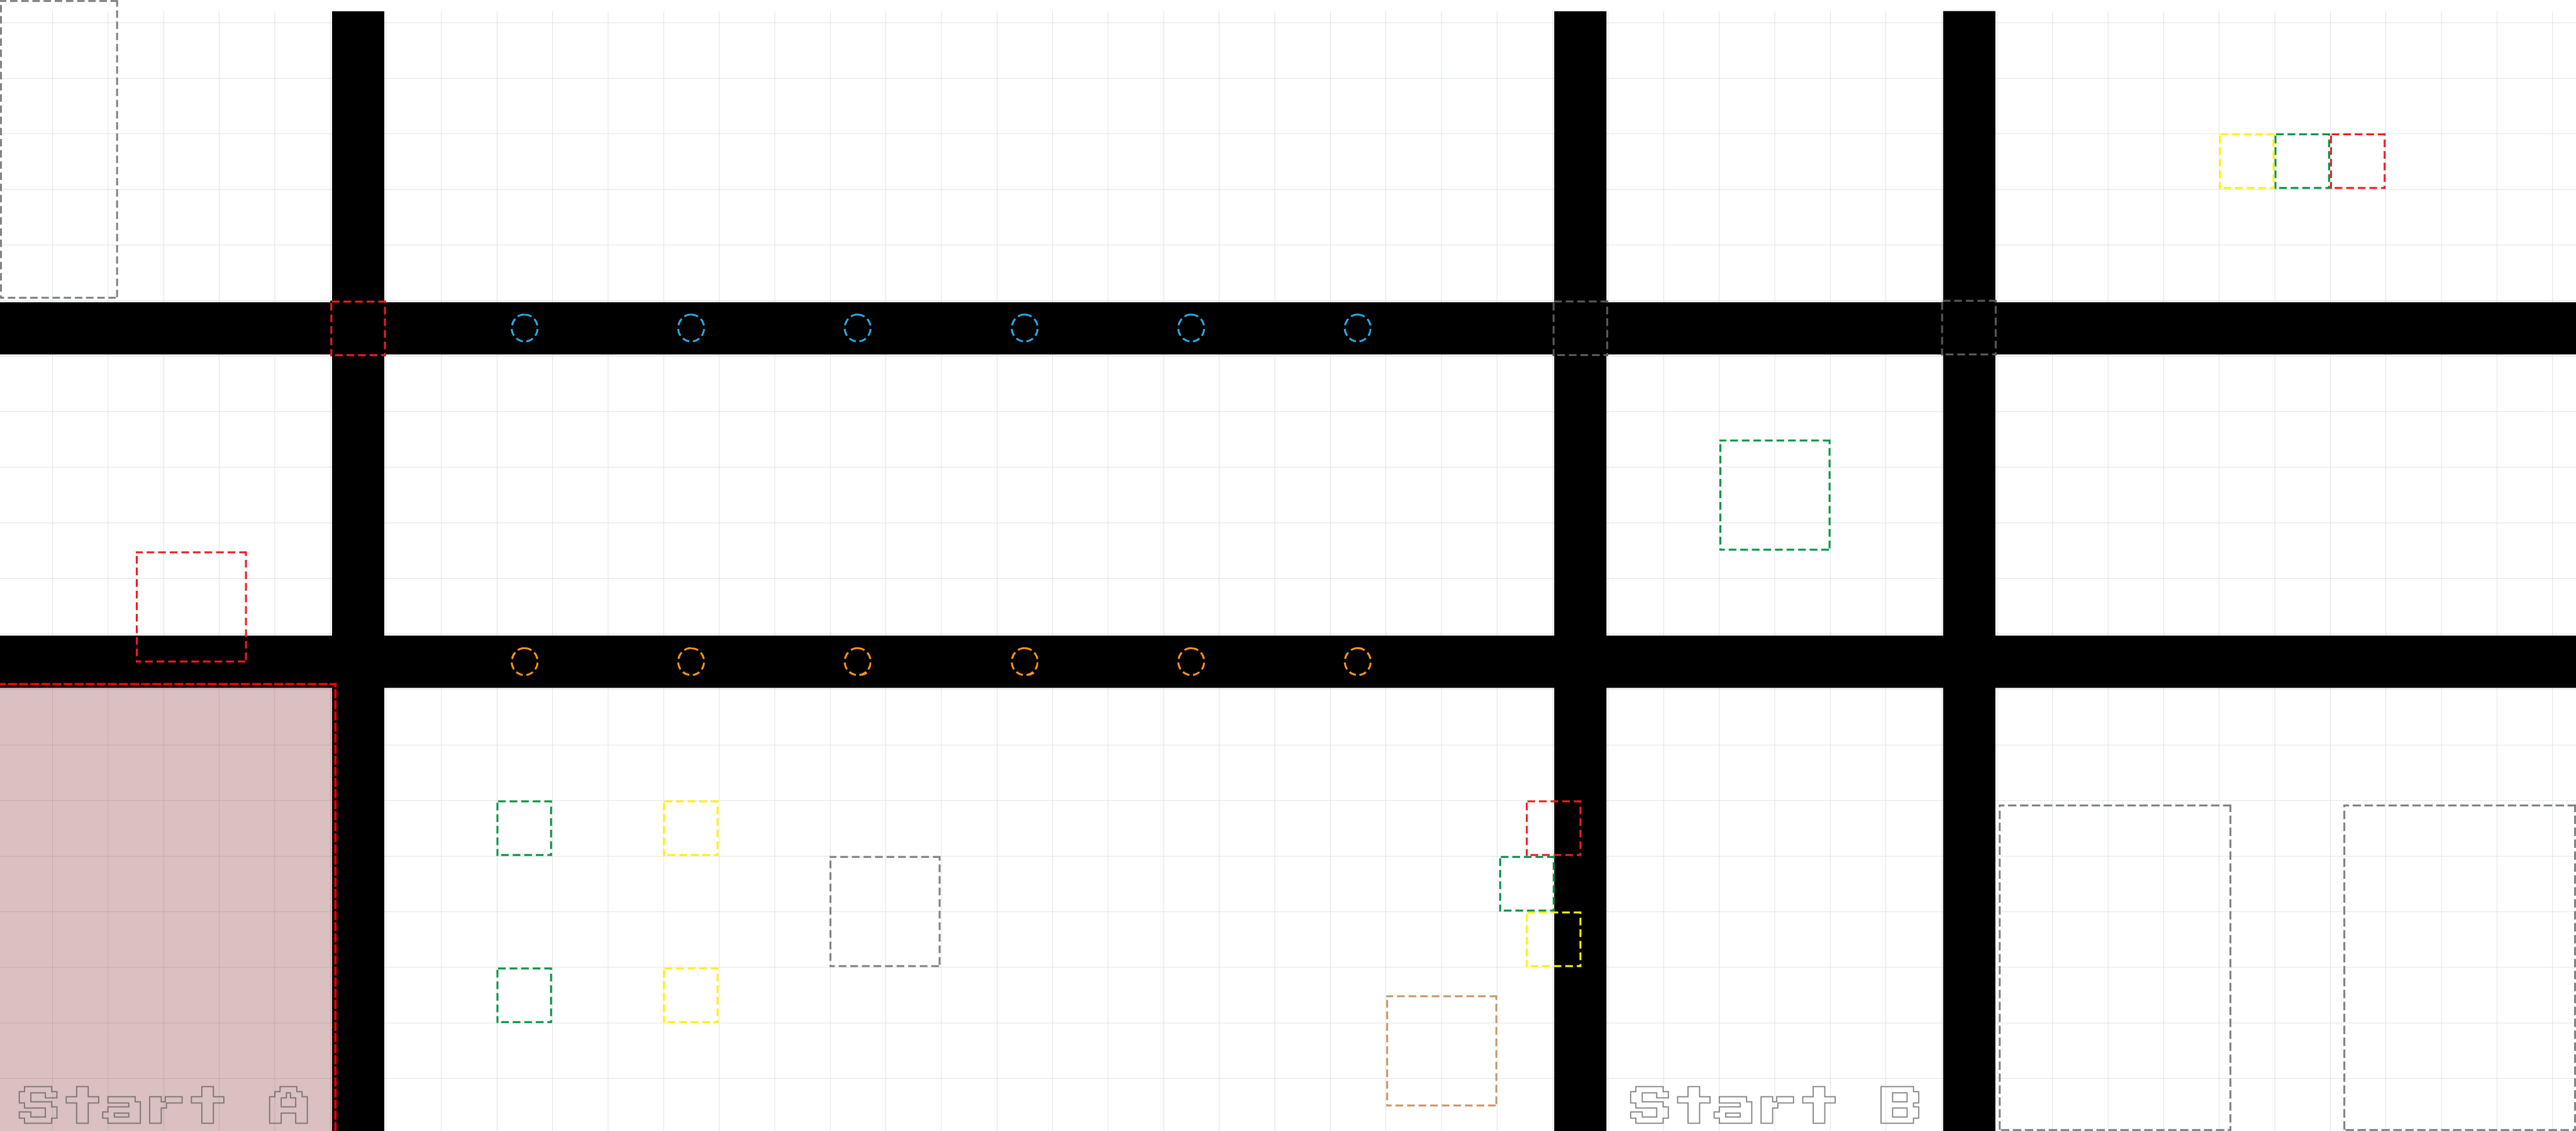 Sketch: starting box, both cube pairs, and your path
Draw on the printed copy, or describe the layout in the box below.
Now turn your map into an ordered list of moves — in plain English first, then the library function each one becomes. Think through the whole grab: arm up and claw open to start, drive to the cube, lower, grab, lift, carry, lower onto the base cube, release.
| # | What the robot does (plain English) | Library call |
|---|---|---|
| 1 | Arm up, claw open (get ready) | |
| 2 | ||
| 3 | ||
| 4 | ||
| 5 | ||
| 6 | ||
| 7 | ||
| 8 |
With stack 1 done, your robot has to move over and line up with the second pair of cubes. You’ll do this with the tools you have: turn, drive, turn back. Turn to face the direction of the second stack, drive over to it, then turn back to face the cubes — squared up and ready to repeat.
For example, to shift to the right and face forward again:
turn_right();      // face sideways toward stack 2
Tick_Drive(____);  // drive over to line up with it
turn_left();       // turn back to face the cubes
The two turns cancel out your heading, so you end up facing the same way — just shifted over. The drive distance lines you up with the second pair.
Which way does your robot need to shift for stack 2 — left or right? Write the three calls (turn, drive, turn back) you’ll use, with your value. (You can use Tick_Drive or Back_Drive depending on your path.)
Now write it for real. Here is the frame — nothing more. Include your library, enable your , and you’ll fill each section with the calls from your own planning tables in Phases 4 and 5. There are no answers to copy here on purpose: the sequence lives in your plan, and only you have it.
#include <kipr/wombat.h>

#include <yourname.h>     // all your tuned tools

int main()
{
	enable_servo(0);          // arm
	enable_servo(3);          // claw

	// ===== STACK 1 =====
	// (write your calls from your Phase 4 plan)


	// ===== REPOSITION to stack 2 =====
	// (your turn / drive / turn-back from Phase 5)


	// ===== STACK 2 =====
	// (your calls)


	return 0;
}
Translate your plan line by line. Each row of your Phase 4 table is one function call. If you skipped the planning, this is where it catches up with you — go back and finish your map first.
Before you run it: read your main() out loud as a list of actions. Does it match the path you mapped in Phase 3? Fix any step that’s out of order.
Run the mission. It almost certainly won’t be perfect the first time — that’s normal for a full mission. Test it in pieces: get stack 1 working first, then the reposition, then stack 2. Record what you fix.
Debug in chunks
Don’t try to fix the whole run at once. out everything after stack 1 and get that perfect. Then add the reposition. Then stack 2. A mission is easiest to fix one piece at a time.
| Try | Which part failed? | Why (your best guess) | What you changed |
|---|---|---|---|
| 1 | |||
| 2 | |||
| 3 | |||
| 4 | |||
| 5 |
| Goal | Done? (✓) |
|---|---|
| Stack 1: cube placed on opposite-color cube | |
| Reposition: robot lined up with second pair | |
| Stack 2: second cube placed on opposite-color cube |
Which part of the mission was hardest to get right — a stack, or the reposition? Why?
AI Literacy Thread
Complex tasks are accomplished by sequencing reliable, reusable behaviors.
You just completed a real mission — and you did it without writing a single new low-level command. Every piece was a tool you’d already built and tested. That’s how all complex automation works: a warehouse robot fulfilling an order, a factory line assembling a product, a Mars rover collecting a sample — each is a sequence of reliable, reusable behaviors, planned carefully and run in order. The intelligence is in the planning and the trust you’ve earned in each part.
Complete the reflection on your own.
1. You wrote a whole mission using only library functions. Why was planning the sequence the hardest part, not the code itself?
2. Explain how the reposition (turn, drive, turn back) lined the robot up with the second stack without changing the direction it faced.
3. If one library function (say turn_right) was slightly off, how would that affect the whole mission? Connect this to why you tuned each tool carefully first.
4. Complete in 2–3 sentences: “Complex tasks are accomplished by sequencing reliable, reusable behaviors. This means that to build a hard mission, I should first…”
Finished early? Try one or more of these.
msleep in your servo moves, or a faster drive, save time without losing reliability? Test it.Download saves a local copy of your answers. It does not turn in your work automatically; give the downloaded file to your teacher.
KIPR · Botball Explorer · Unit 3 Big Idea 5 — Capstone Lab